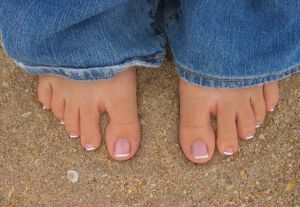
 Ok, so maybe the perfect pedicure would be described using the words free and spa, but for now, we’re going to talk about doing the perfect at-home pedicure. It’s sandal season, and our feet need to be ready!
As with our at-home manicures a couple months ago, there are several supplies we need for this at-home day at the spa. Make sure you have all of them on hand before you get started.
- Tub with warm water
- Scented lotion
- Pumice stone
- Foot scrub (peppermint, if possible)
- Nail file or emery board
- Nail clippers
- Nail polish (in a bright, summery color!)
- Clear polish (for base and top coats)
- Nail polish remover
- Cotton balls
- q-tips/cotton swabs
- towel
Now that you’ve gathered your supplies, it’s time to sit back and get started. You’re only a few simple steps from summery, sandal-ready feet!
- Remove all old polish with the remover and cotton balls. Make sure you also remove any polish that bleeds onto your toes as you do this––you don’t want blotchy feet!
- Soak your feet for 20 minutes in a tub or bowl of warm water mixed with a little scented lotion. This is the perfect time to grab a book, or your Bible, and catch up on some reading. When time’s up, thoroughly dry your feet with the towel.
 Use the pumice stone (Pumice stones look like a hard, rectangular sponges––very porous––and can be found in the nail sections of most stores.) to slough off the dead, dry skin on the heels and balls of your feet. Doing this will make them much softer and smoother (especially after the cold winter weather). Wipe your feet with the towel.
- Gently massage the foot scrub (peppermint-scented is great, since it’s a naturally relaxing scent, which goes well with a foot massage––just don’t fall asleep!) onto your feet to finish scrubbing away any dead skin. Rinse with warm water when done, and dry.
- Clip your toenails to a desired length. Don’t go too short; allow them to extend just barely beyond your nail bed.
- Slowly file your toenails to remove any parts that might snag or scratch.
- After pushing back your cuticles, apply a basecoat of clear polish to protect against staining the nail. (When out in the sun, your nail polish tends to stain your toenails yellow more easily.) Allow to completely dry.
- Apply a coat of your favorite colored polish. (I love OPI Cajun Shrimp––perfect for summer!) When the first coat is dry, apply a second coat. If you get some on your toes, use the q-tip to carefully wipe off the excess.
- Apply your top coat of clear polish to protect against chipping and fading.
- Once the polish is dry, massage some scented lotion onto your feet and you’re ready to go.
Now that your toes look so fabulous, I think it’s time for a new pair of sandals to show them off…very soothing to the sole!
“How beautiful your sandaled feet…” Song of Solomon 7:1
By Lisa Grimenstein
Sounds lovely…I may have to indulge in this soon.